Jekyll allows you to concoct your sites in any way you can dream up, and it’s thanks to the powerful and flexible configuration options that this is possible. These options can either be specified in a _config.yml file placed in your site’s root directory, or can be specified as flags for the jekyll executable in the terminal.
For technical reasons, _config.yml is NOT reloaded automatically when you use jekyll serve. If you change this file, please restart the server process.
Site Settings
Theme
If you’re using the Ruby gem version of the theme you’ll need this line to activate it:
theme: jekyll-text-theme
Skin
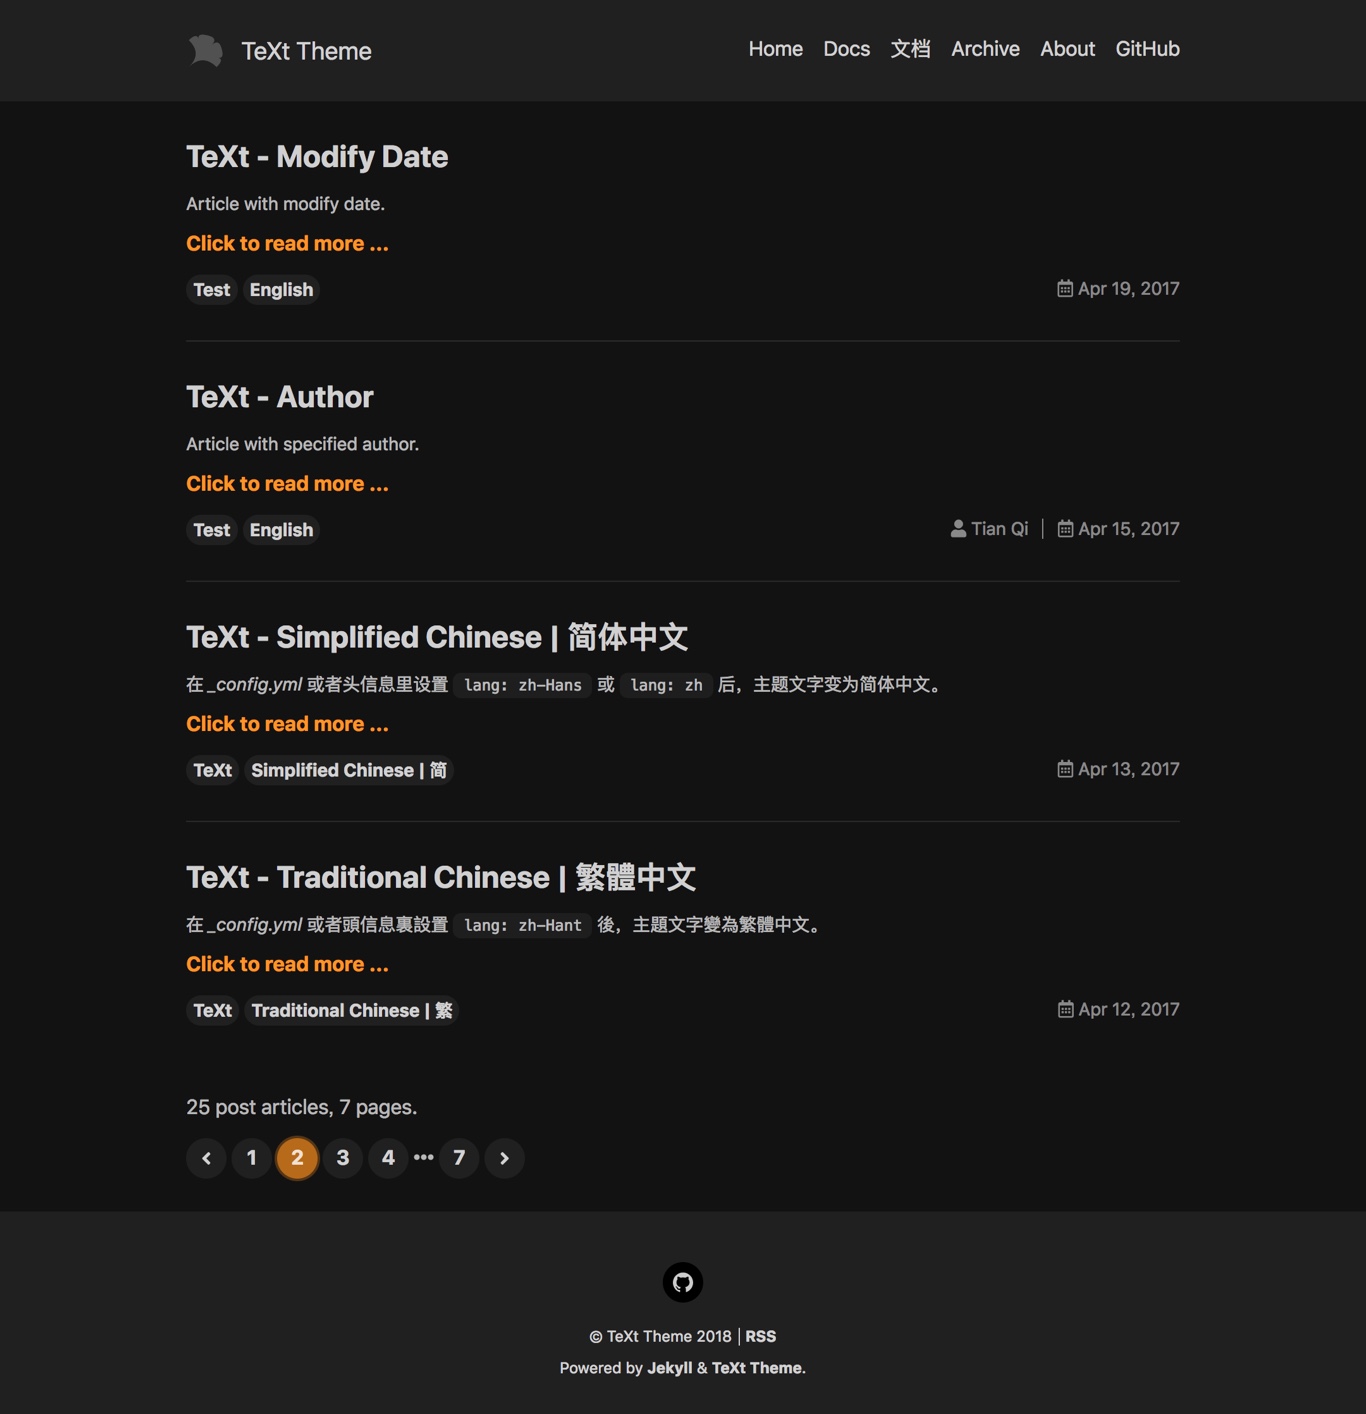
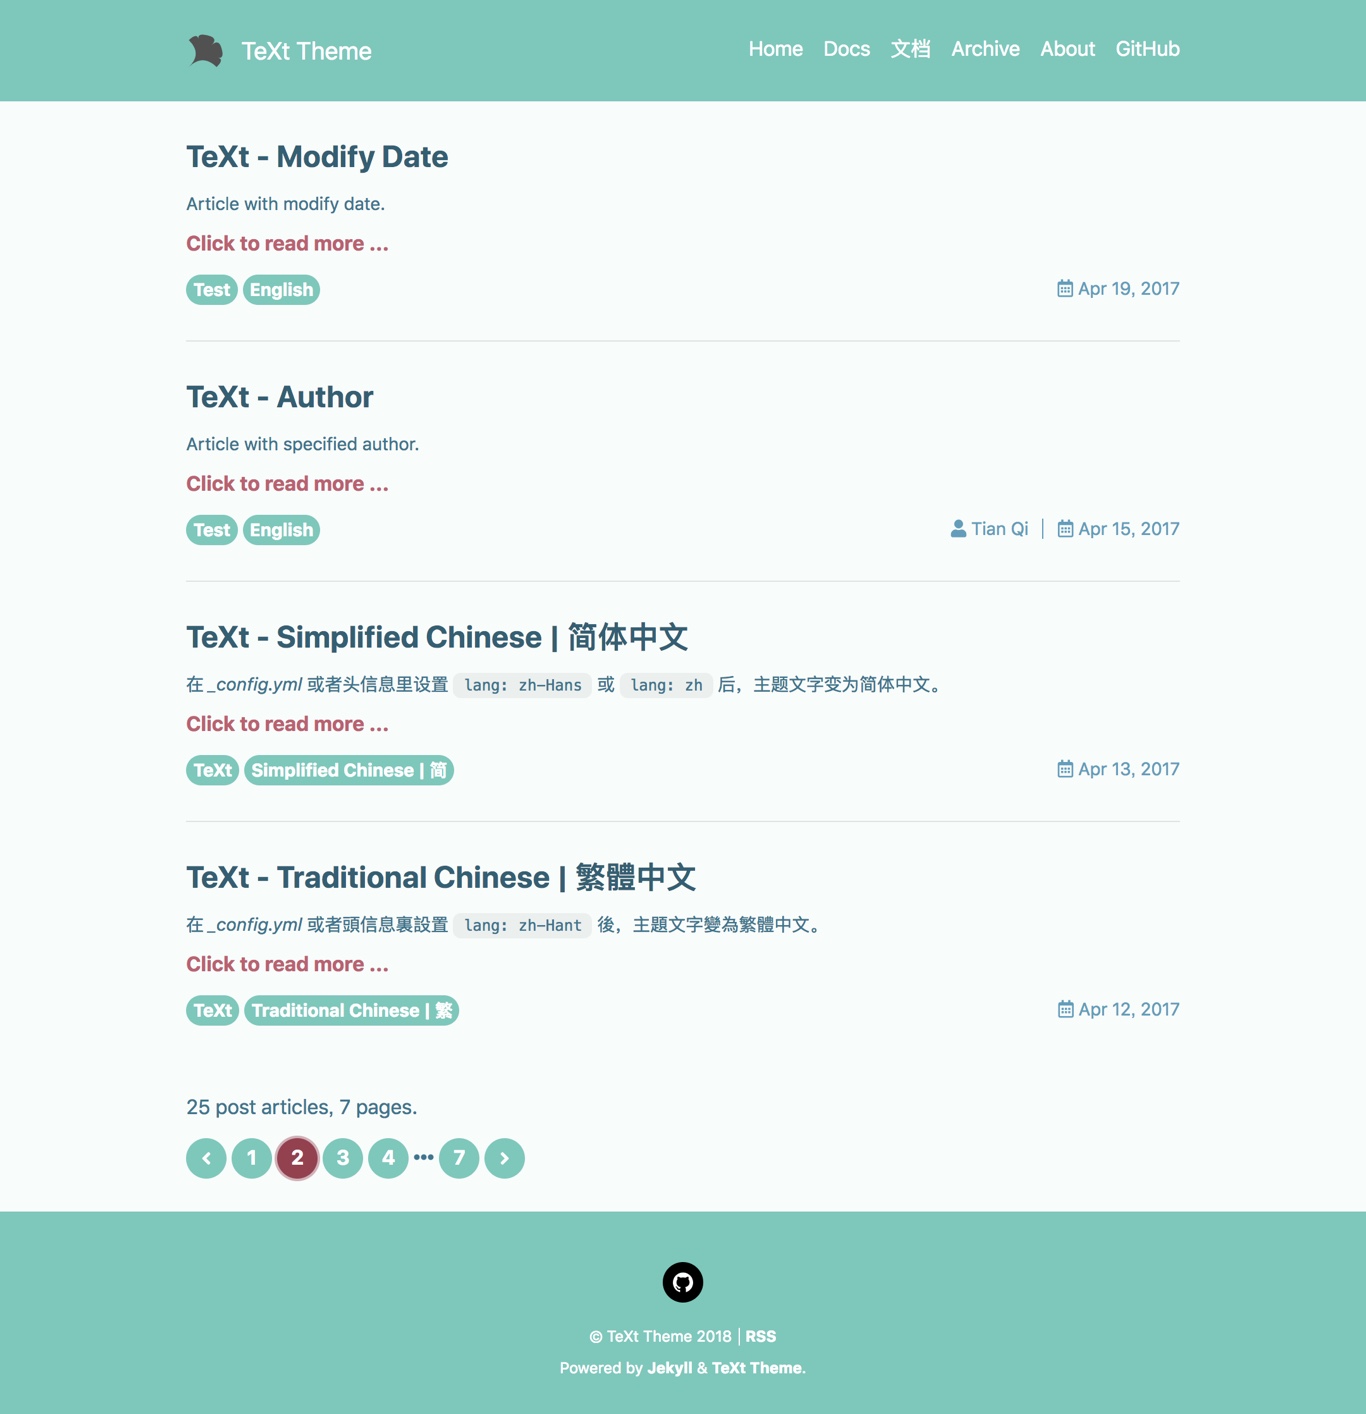
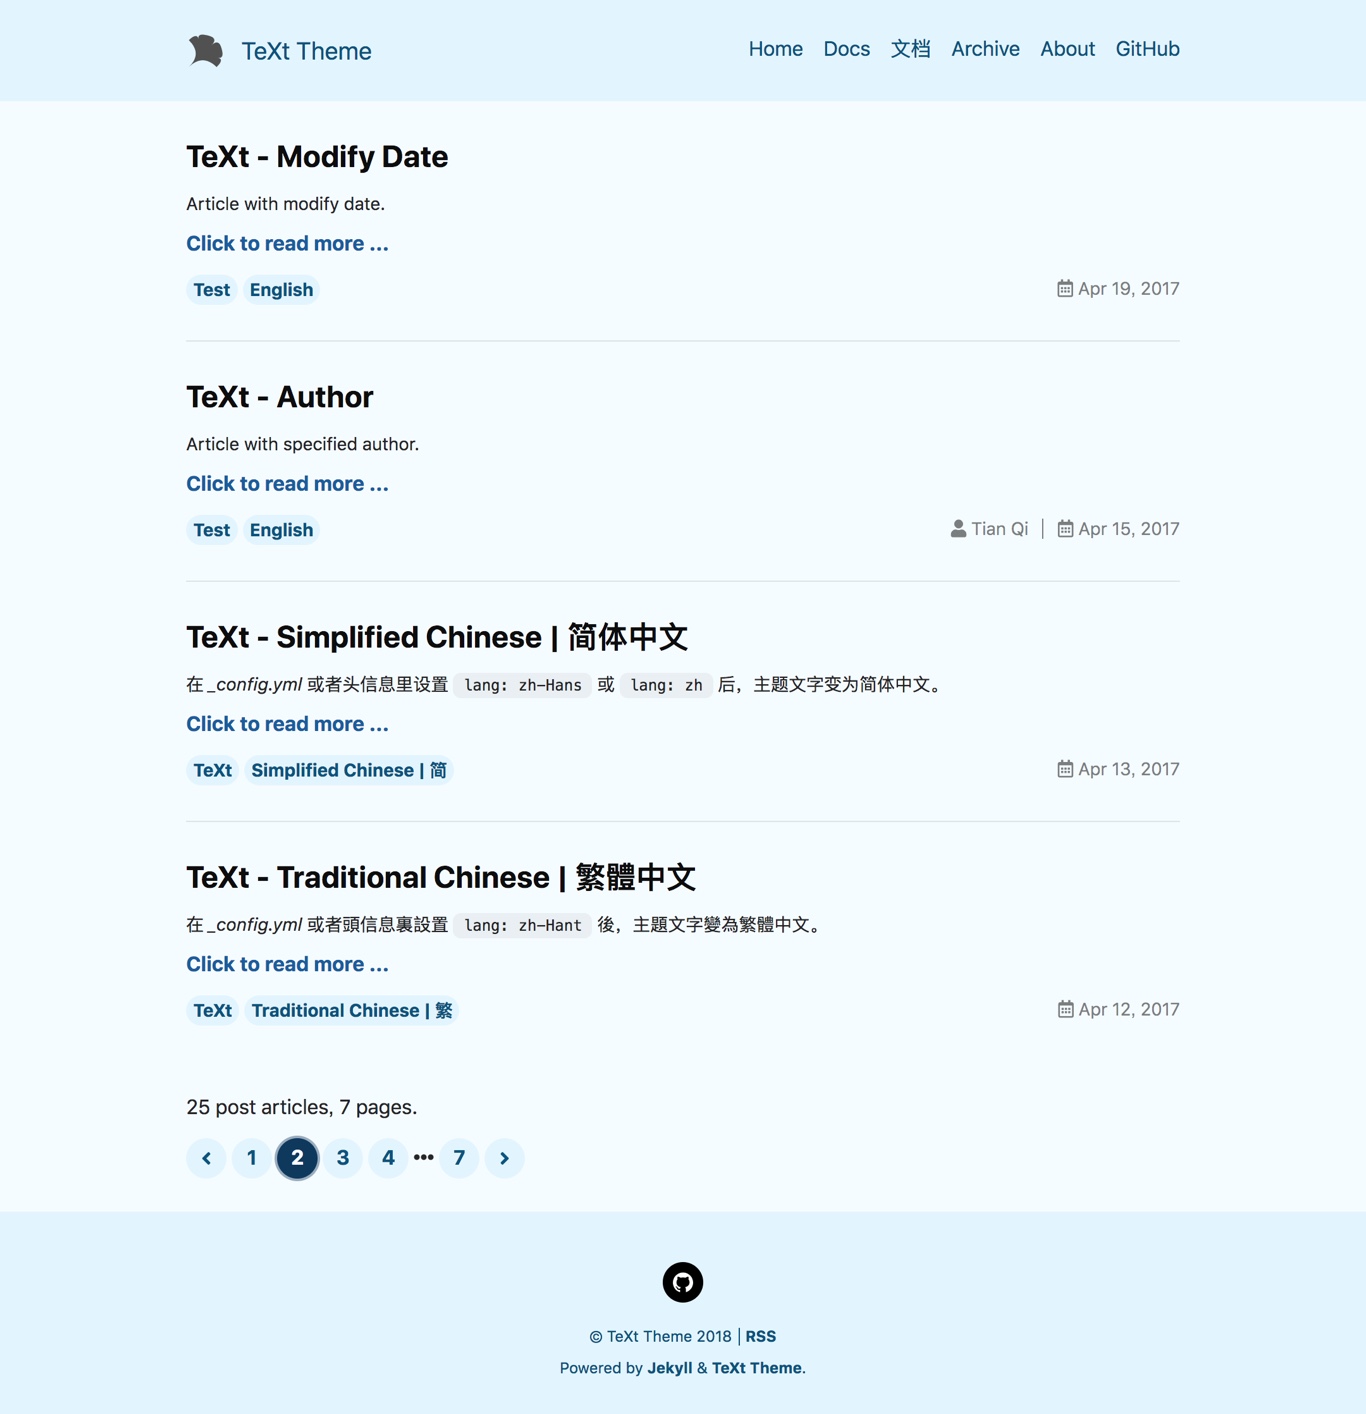
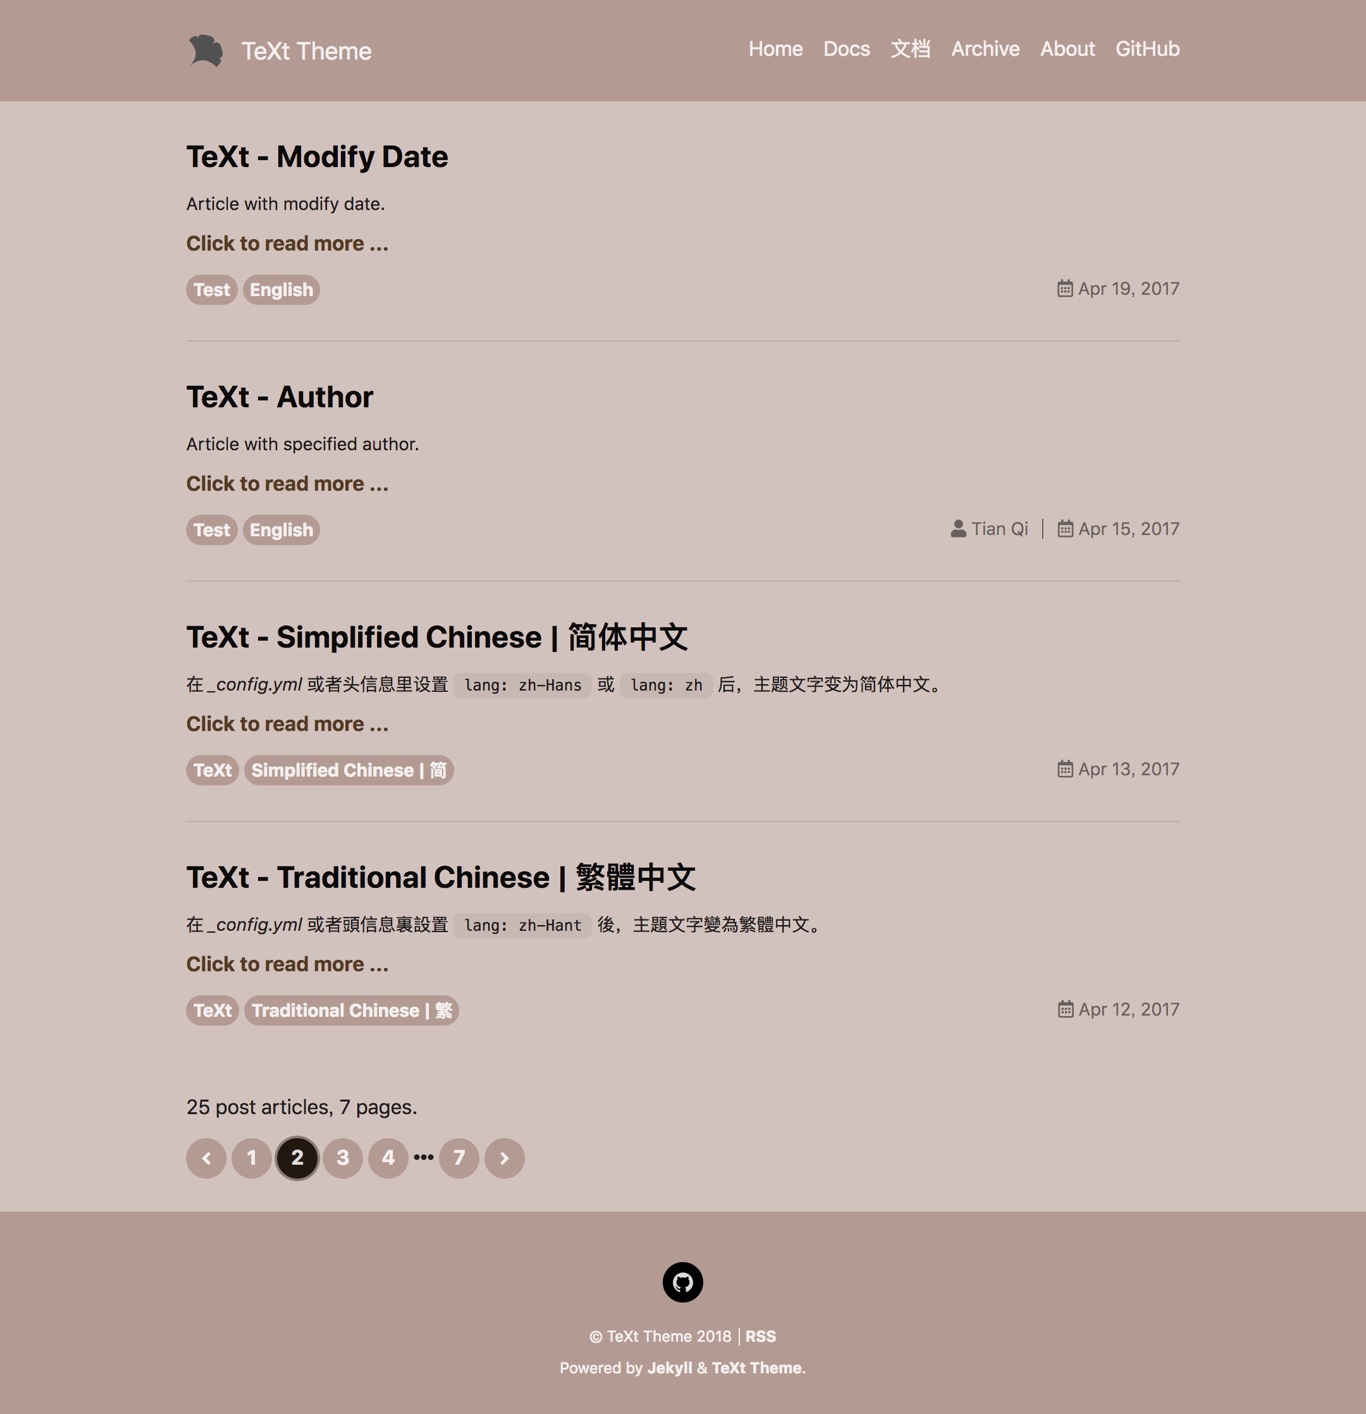
TeXt has 6 built-in skins, you can also set up your own skin.
default |
dark |
forest |
|---|---|---|
 |
 |
 |
ocean |
chocolate |
orange |
|---|---|---|
 |
 |
 |
text_skin: default # "default" (default), "dark", "forest", "ocean", "chocolate", "orange"
Highlight Theme
TeXt use Tomorrow as the highlight theme.
tomorrow |
tomorrow-night |
tomorrow-night-eighties |
tomorrow-night-blue |
tomorrow-night-bright |
|---|---|---|---|---|
 |
 |
 |
 |
 |
Every skin has a default highlight theme, but you can overwrite it by highlight_theme variable.
highlight_theme: default # "default" (default), "tomorrow", "tomorrow-night", "tomorrow-night-eighties", "tomorrow-night-blue", "tomorrow-night-bright"
URL
The base hostname and protocol for your site. if you are hosting the site on Github Pages this will be set as the GitHub Pages domain (cname or user domain)1. For example, https://kitian616.github.io or https://kitian616.github.io if there is cname file.
Jekyll 3.3 overrides this value with url: http://localhost:4000 when running jekyll serve in a development environment2. You can specifying Jekyll environment3 to production environment by JEKYLL_ENV=production to avoid this behavior.
Base URL
The base URL for your site, default to ‘/’. If you are hosting the site on Github Pages this will be set as the project name for project pages if none is set1.
Title
The name of your site.
title: "My Awesome Website"
Description
Use some words to describe your site.
description: > # this means to ignore newlines until "nav_lists:"
  A website with awesome stories.
Language and Timezone
Language
The language of your site, you can override it with different ones on specific posts, pages by YAML Front Matter4, learn more at Internationalization.
lang: en
Timezone
Set the time zone for site generation. This sets the TZ environment variable, which Ruby uses to handle time and date creation and manipulation. A list of all available values can be found HERE.
When serving on a local machine, the default time zone is set by your operating system. But when served on a remote host/server, the default time zone depends on the server’s setting or location.5
timezone: Asia/Shanghai
Author and Social
Information of the site author (a person, a team or an organization).
Type
Type of the site author, a person or an organization, used by schema.org markup, default as “person”.
Name
Used to assign a site author.
Avatar
Photo or Logo for site author
Bio
Short introduction for site author
Social
Username or id of site author’s social networks.
TeXt supports Email, Facebook, Twitter, Weibo, Google Plus, Telegram, Medium, Zhihu, Douban, Linkedin, Github and Npm, more to be added.
Depending on your settings, the social network buttons would show on every pages’ footer.
GitHub repository
Setting for GitHub Metadata plugin, you can refer to HERE for more info.
In order for jekyll-github-metadata to know what metadata to fetch it must be able to determine the repository NWO to ask GitHub about.
“NWO” stands for “name with owner.” It is GitHub lingo for the username of the owner of the repository plus a forward slash plus the name of the repository, e.g. kitian616/jekyll-TeXt-theme, where “kitian616” is the owner and “jekyll-TeXt-theme” is the repository name.
repository: user_name/repo_name
Post
Excerpt
Each post automatically takes the first block of text, from the beginning of the content to the first occurrence of excerpt_separator, and sets it as the post’s excerpt.
The post’s excerpt is show in the articles list in the home layout. There are two excerpt types, text type and html type.
| Type Name | Description |
|---|---|
| text | the excerpt are plain text that filters out all non-text elements (such as title, link, list, table, picture, etc.) and only show 350 characters most. |
| html | the excerpt are HTML document just like the content of the article, This will show all the content by default, except adding <!--more--> in the article Markdown file, You can find more info HERE. |
excerpt_separator: <!--more-->
excerpt_type: text # text (default), html
This setting has been MOVED to the YAML Front Matter of Articles and home layout Since Version 2.2.0, You can find more information HERE.
License
| Name | License | Image |
|---|---|---|
| CC-BY-4.0 | Attribution 4.0 International |  |
| CC-BY-SA-4.0 | Attribution-ShareAlike 4.0 International |  |
| CC-BY-NC-4.0 | Attribution-NonCommercial 4.0 International |  |
| CC-BY-ND-4.0 | Attribution-NoDerivatives 4.0 International |  |
license: CC-BY-NC-4.0
TOC
Elements to use as headings.
toc:
  selectors: "h1,h2,h3"
Markdown Enhancements
To improve the user experience for both reading and writing posts, TeXt made some enhancements for markdown. By default, all the enhancements for markdown is enabled. you need set the settings to true to enable them:
# Mathjax
mathjax: true
mathjax_autoNumber: true

# Mermaid
mermaid: true

# Chart
chart: true
And also you can override it with different ones on specific posts, pages by YAML Front Matter4.
Check Writing Posts for detail usage.
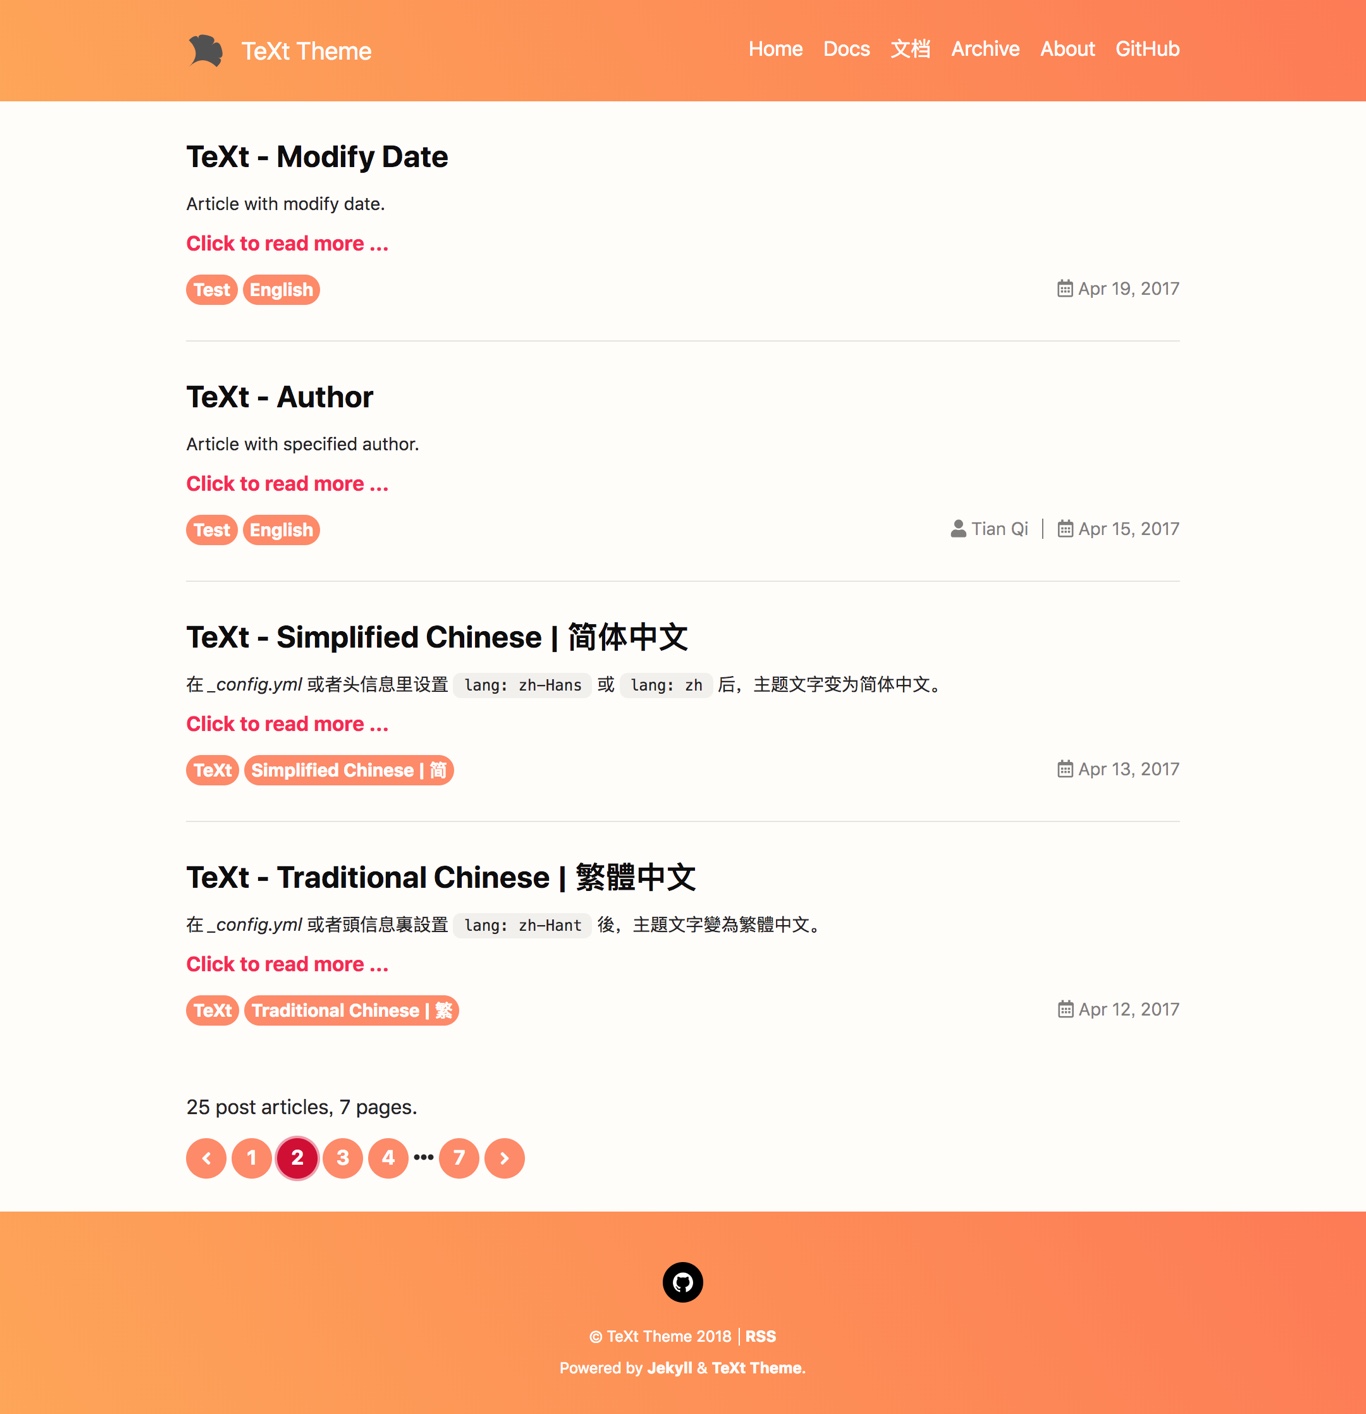
Paginate
Settings for Jekyll Paginate plugin. to enable pagination for posts on your blog, add a line to the _config.yml file that specifies how many items should be displayed per page:
paginate: 8
The number should be the maximum number of posts you’d like to be displayed per-page in the generated site.
You may also specify the destination of the pagination pages:
paginate_path: /page:num # don't change this unless for special need
Sources
TeXt use CDN6 for speed improvements, You can choose BootCDN (default) or unpkg as your site’s CDN provider, both of them are open source and free.
If your website is mainly for Chinese, just use BootCDN.
sources: bootcdn # bootcdn (default), unpkg
Sharing
| Name | Sharing Provider | Minimum Version |
|---|---|---|
| addtoany | AddToAny | 2.2.2 |
| addthis | AddThis | 2.2.3 |
| custom |
AddToAny
comments:
  provider: addtoany
AddThis
comments:
  provider: addthis
  addthis:
    id: "your-addthis-pubid"
You NEED set sharing variable as true in the page’s YAML Front Matter to enable sharing on this page, you can find more information HERE.
Comments
| Name | Comments Provider | Minimum Version |
|---|---|---|
| disqus | Disqus | |
| gitalk | Gitalk | |
| valine | Valine | 2.2.4 |
| custom |
Disqus
To use Disqus you’ll need to create an account and shortname. Once you have both update _config.yml to:
comments:
  provider: disqus
  disqus:
    shortname: "your-disqus-shortname"
Gitalk
To use Gitalk you need a GitHub application, if you don’t have one, Click here to register a new one. and then update _config.yml to:
comments:
  provider: gitalk
  gitalk:
    clientID    : "github-application-client-id"
    clientSecret: "github-application-client-secret"
    repository  : "github-repo"
    owner       : "github-repo-owner"
    admin: # Github repo owner and collaborators, only these guys can initialize github issues, IT IS A LIST.
      - "your-github-id"
      - "the-other-admin-github-id"
Valine
To use Valine you need a LeanCloud application, see LeanCloud for more information.
comments:
  provider: valine
  valine:
    app_id  : "your-leanCloud-app-id"
    app_key : "your-leanCloud-app-key"
For all the above comments systems, you NEED set key variable in the page’s YAML Front Matter to enable comments on this page, you can find more information HERE.
Pageview
| Name | Pageview Provider |
|---|---|
| leancloud | LeanCloud |
| custom |
LeanCloud
This use LeanCloud as back-end service. You need create an application on the dashboard, and config the app’s id, key and class name.
The detail guide of LeanCloud will find in Chinese document since LeanCloud haven’t provide an English-language edition.
pageview:
  provider: leancloud
  leancloud:
    app_id    : "your-leanCloud-app-id"
    app_key   : "your-leanCloud-app-key"
    app_class : "your-leanCloud-app-class"
For all the above pageview statistics, you NEED set key variable in the page’s YAML Front Matter to enable statistics on this page, you can find more information HERE.
Analytics
| Name | Analytics Provider |
|---|---|
| Google Analytics | |
| custom |
Google Analytics
In order to use Google Analytics, set tracking_id to your Google Analytics tracking code. You can also set anonymize_ip to true to anonymize IP tracking for analytic.
analytics:
  provider: google
  google:
    tracking_id: "your-google-analytics-tracking-code"
    anonymize_ip: true